
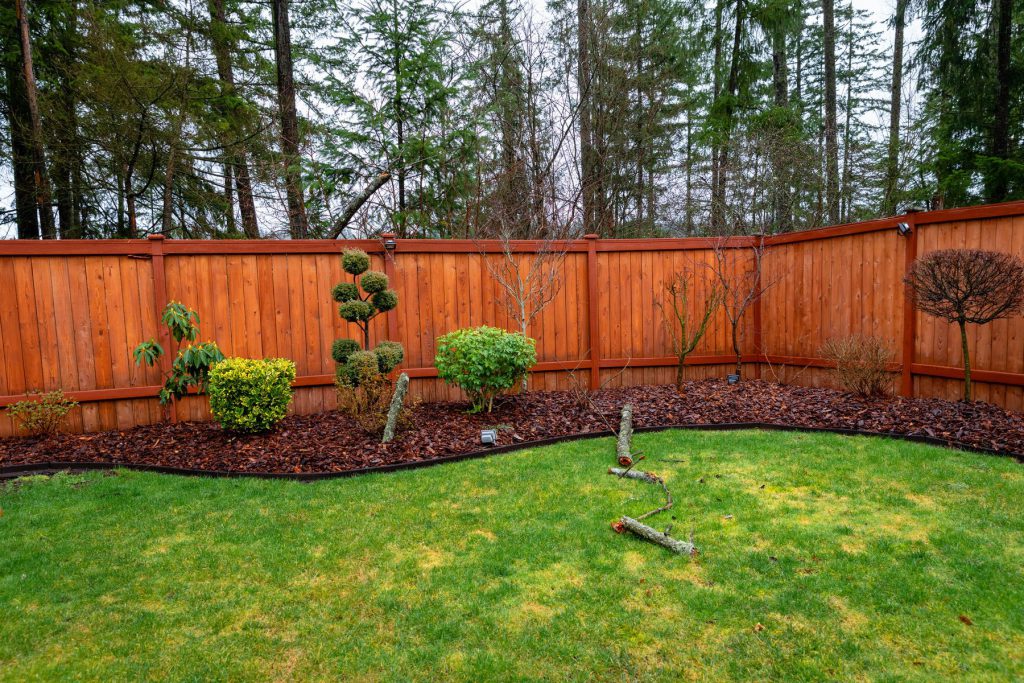
Your cedar fence looked sharp when it was first stained: warm wood tones, clean lines, a finished look across your yard. So when fading, peeling, or a grayish cast shows up a year or two later, it is frustrating.
For a lot of Canton homeowners, that disappointment traces back to how the cedar fence stain was applied from the start. Southeast Michigan’s freeze-thaw cycles are punishing on exterior wood, and a stain job that skips proper prep will not survive them. Here is what actually causes cedar fence staining to fail, and what a correct job looks like.
Key Takeaways
- Cedar is naturally resistant to rot and insects, but UV rays and moisture will still break it down without a quality stain.
- Staining wet or dirty wood is one of the most common causes of early stain failure.
- Michigan’s freeze-thaw cycles create conditions that accelerate peeling when prep is skipped or rushed.
- Choosing the wrong stain type, or applying too much, leads to peeling, blotching, and wasted money.
- Most cedar fences need re-staining every 2 to 5 years, depending on sun exposure and the product used.
Why Cedar Still Needs a Quality Stain
Cedar has a well-earned reputation as a durable fence material. It contains natural oils that resist rot and insects better than most other wood species, but those oils do not protect cedar from everything, and in Michigan the threats are real.
Ultraviolet rays break down the wood’s lignin, the structural compound that holds wood fibers together, turning unprotected cedar gray, dry, and brittle over time. Moisture compounds the damage, working into the grain and causing it to expand, contract, warp, and crack with each weather cycle. Without intervention, even the most resilient cedar fence will weather significantly within the first year of exposure.
A cedar fence stain penetrates the wood fibers rather than sitting on top of them, and that penetration is what makes stain different from paint, since it becomes part of the wood instead of a surface film. Stain lets the wood breathe and moves with it, while paint forms a film that can peel and trap moisture, so staining also preserves cedar’s natural look while offering better durability.
Done wrong, though, a stain job can fail within months, leaving your fence in worse shape than if it had never been touched.
The Most Common Cedar Fence Stain Problems
Most stain failures trace back to one of a handful of mistakes. Some happen during prep, some during application, and some come down to the product itself.
Staining Wet or Dirty Wood
This is the single most common cause of premature cedar fence stain failure. Staining wet wood traps moisture, which eventually pushes outward and takes the stain with it, producing the peeling and bubbling homeowners notice months after a fresh application.
New cedar fences should weather for 4 to 6 weeks before staining so surface moisture can evaporate and the wood can stabilize, which helps the stain penetrate and hold longer. If you are re-staining an existing fence, the wood needs to be completely dry after cleaning, which usually means waiting at least 24 to 48 hours before any stain goes on.
The water test is a simple check: sprinkle water on the boards, and if it absorbs within 10 minutes the wood is ready, but if it beads, wait and test again later. Old fences also accumulate mildew, grime, mill glaze, and oxidized wood fibers, so a surface that looks clean can still have enough contamination to prevent proper adhesion.
Choosing the Wrong Stain Type
Not all stains work the same way on cedar. Oil-based stains have long dominated the cedar market for their penetration and durability, using solvents that drive pigments and protective compounds deep into the fibers, which typically means reapplication every 3 to 5 years under normal conditions.
Water-based stains perform well on most woods and are simpler to clean up, but oil-based stains are better for tannin-rich woods like cedar and redwood, and water-based options may need recoating sooner in harsh conditions. Beyond base type, opacity matters: transparent stains show the grain but offer the least UV protection, semi-transparent adds protection while keeping the grain visible, and solid stains resist UV best but behave more like paint and can peel if the surface is not perfectly prepared.
For most cedar fences in Canton, a quality semi-transparent or semi-solid penetrating stain hits the right balance. Using a stain not formulated for cedar means the product may sit on the surface instead of soaking in, which makes peeling much more likely. For a deeper look at how stain and paint differ as exterior coatings, our post on painting versus staining exterior surfaces covers the material differences in detail.
Applying Stain in the Wrong Conditions
Weather affects stain performance more than most homeowners expect. Staining in direct, harsh sunlight or on a humid day makes it harder for the stain to dry correctly, leading to surface cracks and flaking, and rain on freshly applied stain can wash it out before it sets.
Sunny days with temperatures between 50°F and 90°F and low humidity are ideal, and you should avoid staining if rain is in the forecast for the next 24 to 48 hours. If the forecast calls for rain that afternoon, the job should wait, since staining around that window is one of the fastest ways to waste both time and product.
Over-Applying the Stain
More product does not mean better protection. Applying stain too thickly causes uneven drying and a blotchy look, so apply one even coat using smooth, overlapping strokes without overloading the brush.
The professional approach is to apply stain one board at a time, working with the grain and back-brushing to drive the product into the wood. End grain on the tops and bottoms of boards deserves extra attention, since those surfaces absorb moisture many times faster than the face of the board.
Skipping Prep on an Old Fence
Re-staining over a failing coat without proper prep is a common shortcut that backfires. If the existing stain is peeling or flaking, a new coat on top just traps the failure underneath, since peeling signals a film-forming product or trapped moisture, so the fix is to strip, brighten, dry thoroughly, and switch to a penetrating stain.
If the old stain is in decent condition, just faded and dry, a maintenance coat over a clean, dry surface can work: clean thoroughly, lightly sand rough areas, and apply a fresh coat directly over the old stain. But if the stain has failed, the only way to get a lasting result is to strip and start fresh, one of the prep failures covered in our post on cheap paint and coating problems that cost more.
What Michigan’s Climate Does to a Fence Finish
Canton sits in southeast Michigan, an area whose weather is particularly hard on exterior wood coatings. Hot, humid summers put stain under constant UV stress, while winters bring snowmelt, moisture absorption, and repeated freeze-thaw cycles.
Homes here deal with snow, ice, wind, moisture, and repeated freeze-thaw throughout the winter, which is especially hard on exterior wood details. When moisture gets into even small gaps in a coating and temperatures drop, the water expands, then contracts as temperatures rise, putting mechanical stress on the coating and the wood beneath it with each cycle.
When water freezes, it expands by about 9%, creating pressure inside tiny cracks, seams, and pores. A stain job that was not done correctly, whether because the wood was wet, prep was skipped, or the product was wrong, is especially vulnerable, since Michigan winters find every weak point and make it worse. That is why a correct cedar fence stain application matters more here than in milder climates.
For help choosing the right product type for exterior wood in this climate, our post on oil versus latex exterior paint and stain choices is worth reviewing. When evaluating stain products, the EPA’s VOC standards for architectural coatings can help you understand content limits and what to look for in a quality coating.
How to Tell When Your Cedar Fence Needs Re-Staining
How often you re-stain depends on the climate, how much sun and rain the fence gets, and the type of stain used, but generally you will want to refresh every 2 to 5 years.
The simplest check is the water test again: sprinkle water on the boards, and if it beads and rolls off, the stain is still working, but if it soaks straight in, the stain has worn through and the wood is exposed.
Other signs to watch for:
- Color that looks faded, chalky, or uneven across sections.
- Boards that feel rough or dry to the touch.
- Visible cracks or splitting in the wood grain.
- Any areas where the existing stain has lifted, bubbled, or peeled.
Catching these signs early means a simpler job, typically a clean and a maintenance coat. Waiting too long usually means more prep work, higher cost, and a longer process before any new stain will hold correctly.
What a Professional Staining Job Actually Looks Like
When preparation and application are handled correctly, a cedar fence stain job holds up. Here is what a professional approach looks like from start to finish.
Surface Assessment
A walk of the entire fence checks for loose nails, damaged or warped boards, mildew growth, and the condition of any existing stain. Any boards that need repair get addressed before any coating goes on.
Cleaning
The fence gets washed with a wood cleaner or brightener to remove dirt, mildew, grime, and old stain residue. Pressure washing, if used, should be on a low setting, since too much pressure raises the grain aggressively and can damage softer wood fibers.
Drying
The fence dries completely before any stain goes on, and that waiting period is non-negotiable regardless of how clean the surface looks. The wood’s moisture content needs to be within the right range for the stain to absorb correctly.
Product Selection
The right stain matches the wood type, age, condition, and exposure. For cedar fences in the Canton area, a quality penetrating exterior stain with UV resistance and mildew inhibitors built in is typically the right call.
Application
Stain is applied with the grain, working one section at a time, and back-brushed into the wood in thin, even coats with no rushing. End grain on the tops and bottoms of each board gets extra attention, since those surfaces soak up moisture far faster than the face grain.
Inspection
Any drips, pooling, or uneven sections get addressed during application, not after the stain has set.
Paramount Painting Services provides itemized estimates that show exactly what you are paying for in labor and materials, which is also how you can tell the work is not being subcontracted out: our crew does the work, and what we quote is what you pay, with no material overages or surprise charges. We cover and protect surrounding areas before any project starts, do a full cleanup when we are done, and back every project with a 3-year craftsman warranty and a lifetime product warranty. With over 100 years of combined team experience, we have seen what Michigan weather does to exterior wood when a stain job was done right, and when it was not.
That experience is built into our deck and fence staining, where prep comes before any product goes on.
If your cedar fence is showing signs of wear, or you want a new stain job done correctly from the start, you can work with a local cedar fence staining team across Canton, Plymouth, Northville, Novi, and the surrounding area. Edgar and the team will walk the fence with you, assess what the wood actually needs, and give you a straightforward quote before any work begins. Call 734-251-2073 for a FREE estimate today.

